Showing posts with label Photoshop. Show all posts

Monday, April 6, 2009

Old World Style

A graphic I put together using a map, a photoshop action, and some texture layers with blending modes. I also used a quote from where else but a wine bottle that reads:

Wine is life in Italy. Luckily wherever there is wine, there is also food. Italians like to say that people do not over drink: they simply have not eaten enough.

Tuesday, February 10, 2009

Photo Restoration

I thought I would share a photo restoration that I did not too long ago.

Thursday, November 20, 2008

Friday, August 1, 2008

High Pass Sharpening

I was just cruising around some Photoshop tutorial sites and came across one for high pass sharpening and figured I would share it with you. I'm used to sharpening my photos using unsharp mask. With high pass you tend not to add noise or "halos" around objects.

Wednesday, June 18, 2008

Photoshop how-to

Did you ever wonder what your car would look like lowered? In this tutorial I will show you how to lower your car by using the Polygonal Lasso Tool. You can go as mild or wild as you want.

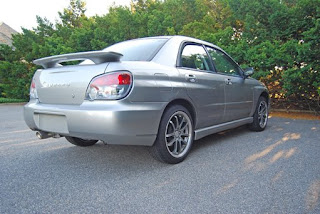
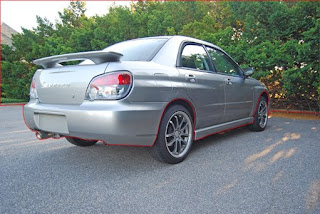
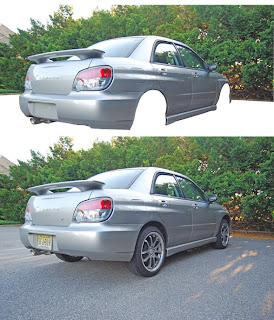
I started off with this picture of my car.I then used the POLYGONAL LASSO TOOL to create a selection that goes along the bottom of the car(not including the wheels). It continues to the outer edges of the picture along a straight edge (here I used the curb) and from there it goes up along the edges of the picture and across the top to complete the selection. The path of the selection is represented by the red line.You then COPY and PASTE so that your selection is a new layer. As you can see in the picture below.You then adjust the new layer up or down to achieve the height or"lowering" that you like. In the final picture below I also used the POLYGONAL LASSO TOOL to create a selection to tint the tail lights and I also got rid of the emblems and lock on the trunk using the Stamp Clone Tool

Wednesday, June 4, 2008

Digital Infrared

In Photoshop CS3 you can simulate infrared film photography (image -> adjustments -> black & white). In these I also added color back by hand coloring (the first image) and by using selections (the second image).

Thursday, May 29, 2008

New Technique

Every now and then while doing adjustments to photos in Photoshop I come across one that no matter what I do to it I just can't seem to get it to look right. I discovered this "technique" while working on one of these so called "stubborn" photos. I'm not claiming this to be a fix all but it may just help you with that next photo you just can't get right.

Original
In the LEVELS palette (image -> adjustments -> levels) you move the middle slider all the way to the left so its next to the "black" slider.
You then add color back using the BRIGHTNESS/CONTRAST palette (image -> adjustments -> brightness/contrast) by moving the "brightness" slider to the left and the "contrast" slider to the right.
Finished