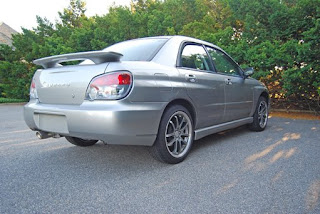
I started off with this picture of my car.
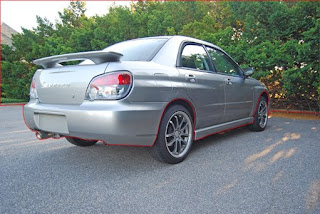
 I then used the POLYGONAL LASSO TOOL to create a selection that goes along the bottom of the car(not including the wheels). It continues to the outer edges of the picture along a straight edge (here I used the curb) and from there it goes up along the edges of the picture and across the top to complete the selection. The path of the selection is represented by the red line.
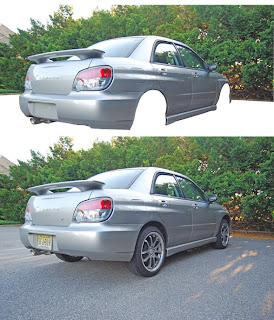
 You then COPY and PASTE so that your selection is a new layer. As you can see in the picture below.
 You then adjust the new layer up or down to achieve the height or"lowering" that you like. In the final picture below I also used the POLYGONAL LASSO TOOL to create a selection to tint the tail lights and I also got rid of the emblems and lock on the trunk using the Stamp Clone Tool


1 comment:
Nice, nice. I don't study photography or graphics design, I just do it for fun :P Self taught all the way. I don't get what's the deal with lo-riders, I never see the appeal.
My graphics are pretty much all here:
http://megamanexev3.deviantart.com/
And here's my photography:
http://flickr.com/photos/arundhir
Post a Comment